Wednesday, September 10, 2014

Stanserhorn

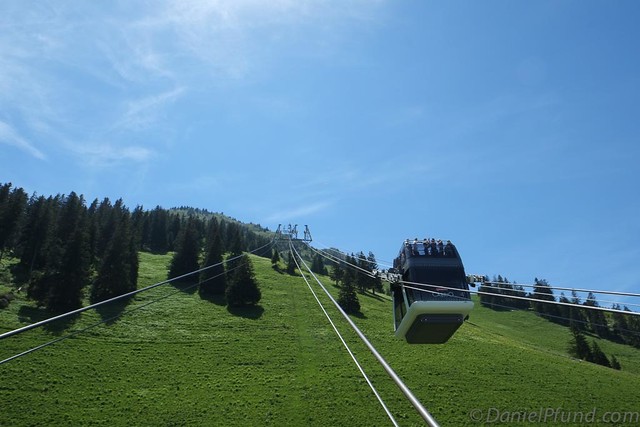
This summer we decided to take a couple of long week-ends to discover Switzerland with the family. The place I absolutely wanted to visit was the Stanserhorn, the mountain near the quaint village of Stans, right in the middle of Switzerland (by Luzern, see map at the bottom). Why was this on my bucket list? Because it has the world’s only open-roof cable car!

For this trip I took my trusty Fuji X-Pro1 with the 18-55mm “kit” zoom lens. I wanted to travel light and not have to change lenses, so I took the only zoom I have. Click on the pictures for bigger versions (and more pictures in my Flickr stream).

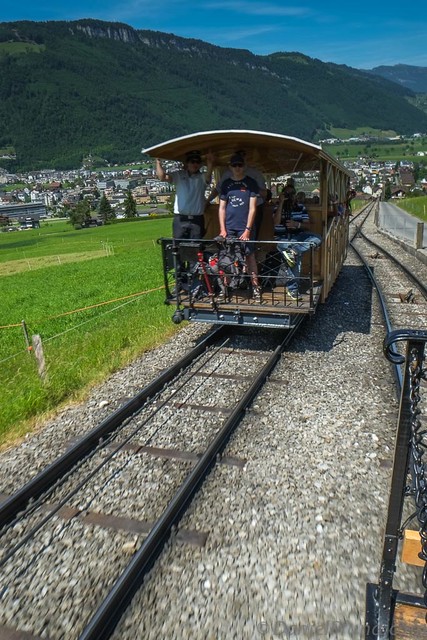
Arriving in Stans, I was first surprised by how small the village was. Park anywhere and you’ll be in walking distance to the train station. The first part of the ascent is done in a little train; very romantic. It takes you past bucolic views with cows and lots of pastureland. You are really in the heart of Switzerland here; this is postcard country! I wondered if I would meet Heidi at the top…

Stanserhorn

After that short train ride, you get to the bottom station of the open-roof cable car. The ride is very smooth, as the cabin is securely supported by very large iron cables. Even my wife, who is afraid of heights, said it was ok for her as she adventured towards the top of the cabin. The feeling of being transported in an open-air cable car is quite amazing; you feel a gentle breeze and the time passes by so quickly; you are able to see so many things at once. The weather was perfect; it was almost like a dream!

Stanserhorn

Stanserhorn

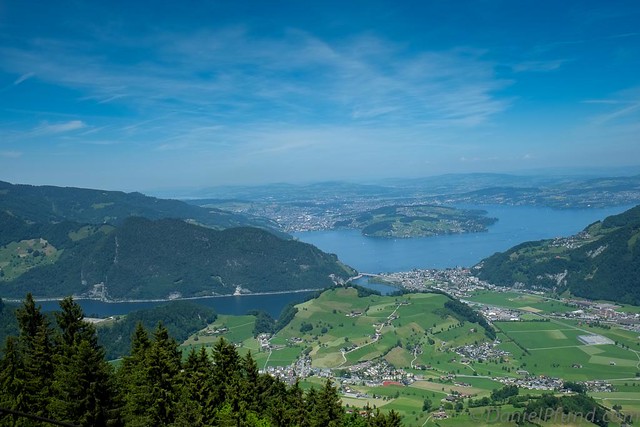
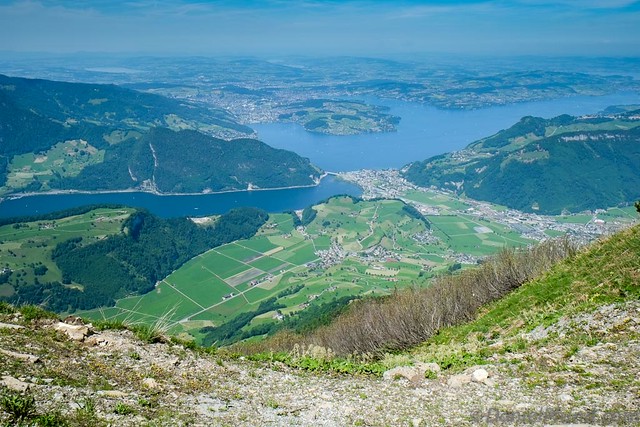
From the top of the Stanserhorn, you get a beautiful view of the 4 canton lake below, as well as many mountain tops. We took a little walk to the summit (about 45 minutes) where we could see some marmots (groundhogs for the Americans). The kids really liked those. There is also a nice restaurant where you can eat local specialties, which came in handy after the short walk.

Stanserhorn

Overall this was a beautiful week-end and I highly recommend you visit the place if you have time in Switzerland. Going up and down is no longer than 1 hour, but take your time to enjoy the views!


View Larger Map

Wednesday, August 6, 2014

Tripcase app review


I had the opportunity to visit Paris over last weekend. As this was a group arranged travel (with my work colleagues), I wanted to keep a neat list of things we were planning to do. For that, I turned to my trusty iPhone and found an app for that: Tripcase. Here is a short review of Tripcase.

Tripcase wants to be the app that holds all your travel information, from flights to hotels and including everything in between (attractions, restaurants, ground travel, car rental, meetings...). I had previously used Tripit which also has a pro version of their app. I found Tripit nice and easy to use, as all you had to do was forward your booking confirmations by email and it would automagically fill out your trip details. That part worked very well, but I couldn't enter any additional details of my trip (like a restaurant for example). That's why I wanted to try out something else. Enters Tripcase.

Tripcase allows you to forward your bookings by email and it will try to enter the information automagically for you, just like Tripit. I forwarded my first flight booking confirmation (an Air France flight) and it created a trip for me. Good start! Then I forwarded my return flight (an Easyjet flight) but all I got was an email saying that it was not possible to parse that booking. Since Tripcase is made by Sabre (a global booking system), and Easyjet doesn't use them, I guess Sabre chose to not integrate other flights outside of their own system. Nevertheless, you can enter your flight manually and that worked, although it's much less convenient. I wish Sabre would enhance Tripcase to include non Sabre bookings in the future (I'm reviewing version 3.3.3 dated 14th of July 2014).

I then proceeded to add ground transportation information like which underground line I had to take to join the city center. This was more like a free form edit, as the app didn't have a specific section for that. The good point about this is that it forces you to plan ahead. Planning a trip is half the fun, or as they say: focus on the journey, not the destination.

I added my hotel and dates; with the name Tripcase found the address. And finally I added an activity and a restaurant. Everything worked fine, but for some strange reason, the timeline display had a bug. It showed me my ground transportation which I had entered at 2:30 PM before my hotel check-in which I had entered for 2:10 PM. Oh, and by the way, if they would allow 24H formats, that would be much easier for us Europeans. Strangely enough, I saw that this was the number 1 request on their website!

Another gripe is the user interface. It definitively does not adhere to Apple's standards of "iOS Human Interface Guidelines". For example, there is a "save" button when you edit an item. This button is at the very bottom of the manual entries, and everytime you enter something, you need to be careful to press the save button, but since it's hidden off the screen, you need to remember to scroll down there, otherwise all your changes are lost. It happened to me only once; you learn quickly! I would suggest to add the button on top in the navigation bar and use the Apple standards of "Cancel" and "Save" as the 2 choices.

As the app has grown over the years (it's apparently already 5 years old), it must have added lots of bells and whistles. I like how it can look up your hotel and fill in information such as the address and telephone number. It also shows you a map of the location. All this is great, but the problem is when you travel, you may not want to incur high roaming charges for data connections or you could find yourself in a remote area without Internet. I wish the app could have an "offline" mode and save the maps for future reference when travelling.

The app is also quite big in social media. There are options to share your complete trip with someone by email or just a specific portion (a flight if they come pick you up for example). I tried to share my flight number and information with my wife and it worked perfectly as advertised.

During the trip, my return flight (Easyjet) was delayed. The app sent me a notification in advance and proposed to find alternative flights. This was very convenient. It also sent me an email everytime my flight status was changed. I don't know where the app gets this information, but it was more precise than even the airport information! When I arrived at the airport, I had a moment of stress when the departure information mentioned that my flight was actually on time. I ran through Orly airport, only to be at the gate, sweating, but without a plane in sight... it was indeed 2 hours late.

Overall I really like Tripcase. I hope they can improve on the user interface and fix the timeline bug. I would really also like an "offline mode" where the maps are saved for you. And if they could speed up the whole app, it would also make for a better experience. The app just feels a bit slow to load and navigate. I guess it's because all the data is held on their servers? That may also explain why you need an Internet connection.

At this point, I'd give it a 4 star (out of 5): recommended.

Saturday, September 7, 2013

Villa Cassel & Aletsch Glacier hike

I had the chance to spend a couple of days in the Riederalp region, home to the Aletsch Glacier, next to Bettmeralp (see map at bottom). For me, this is one of the most beautiful region in Switzerland.

On the first day, we took the train from Geneva to Sierre and had a great lunch there before heading to Brigue. We then took another train for just a small ride to Morel, where we took the cable car to Riederalp.

Riederalp

The views riding up to Riederalp are already breath-taking. Rideralp is one of the few no-cars mountain resorts in Switzerland. Finally from there, we walked about 30 minutes to reach our final destination: the Villa Cassel.

Villa Cassel

Villa Cassel is a big mansion built between 1900-1902 by an english banker, Sir Ernest Cassel, which now belongs to Pronatura, a non-profit organisation working to protect the environment.

Villa Cassel

You can sleep very comfortably up there, gently soothed by the cow's bells.

View from the Churchill suite

A room with a view!

Villa Cassel view

The next day we walked all the way to the Aletsch glacier, and made a 2 hour trip on the glacier itself with the help of a guide (don't attempt this alone, you need suitable equipment). The weather was great: not too hot, not too cold.
I found this region absolutely beautiful and very relaxing. Did you know that this is the biggest inhabited region of Switzerland? And since it's not so easily reachable, there are few tourists. Enjoy the view!

Aletsch Glacier

Aletsch Glacier

Aletsch Glacier

All these pictures were taken with the fabulous Fuji X-Pro1 and the Fuji XF 18mm lens. I can only say great things about this camera, the picture quality is awesome for such a small form factor. My back really enjoyed the light load!

You can see more pictures on my Aletsch Glacier Flickr Set.


View Larger Map

Tuesday, July 30, 2013

International Alphorn Festival in Nendaz (Switzerland)

Last week-end I went to Haute-Nendaz for the 12th international alphorn festival (12e festival international de cor des Alpes in french), as the weather was getting really hot here in Geneva (over 30 degrees).

Unfortunately, it was just as hot up there in the mountains, except for Sunday when a little breeze set in.

I took my trusty Fujifilm X-Pro1 with the 18mm and 35mm prime lenses. I really love my Fuji: it's so light and yet delivers such beautiful image quality. I also congratulate Fuji for listening to their customers, and constantly improving the firmware of the X-Pro 1 camera. I had just upgraded to version 3 of the firmware, and I absolutely love the focus peaking. Thank you so much Fuji !

The week-end festivities were similar to the 2012 Alphorn Festival. On Saturday the 48 contestants had to qualify themselves for the final that took place on Sunday at the top of Haute-Nendaz at Tracouet.

Haute Nendaz

There were also a lot of other activities going on, amongst which a traditional parade on Saturday evening in the village, which the kids really liked.

Vache d'Hérens

If you are ever in the Valais (or "Wallis" as it’s called in Swiss-German) at the end of July, I highly recommend you stay for a week-end in Nendaz for the yearly festival. The 13th edition will take place from July 25-27th, 2014.

Alphorns

Alphorn players

Lac de Tracouet

Haute-Nendaz

Lac de Tracouet

You can find more pictures in my Flickr photostream. Thanks for looking!

Friday, June 21, 2013

Long Exposures With The Fuji X-Pro1

I went to Paris last week for business, but had a free evening to spend with a friend there. We decided to do some long exposure photography.

Normally long exposures are useful to blur out moving water in landscapes. Here we actually "blurred" out people, sometimes even removing them entirely! It's quite a funny feeling when you look at your picture after the long exposure.

As the weather was quite overcast, it was nice to have some moving clouds in there too. It was really a great evening (thanks Jerome)!

Eiffel Tower

The joy of traveling with the Fuji X-Pro1 is that the equipment is considerably lighter than a DSLR kit. I could even take a small tripod (a gorillapod) instead of a huge and heavy one.

My friend Jerome on the other hand, had a Canon EOS-5D MkII and a big tripod; that did attract attention. At one point, in the Jardins des Tuilleries park, a car with park maintainers pulled up to us and asked if he had a permit. They claimed that he was a "professional" because of the tripod!
I think they didn't even notice my Fuji hanging on the gorillapod on a fence. Another great reason for being a Fuji Ninja!

Here's the equipment you need to take long exposures:
  • a tripod
  • a Neutral Density filter: this is like sunglasses for your camera as it simply reduces the amount of light reaching the sensor. You can buy these in several different optical densities. In my case I used an ND1000 (a 10 stop filter, sometimes called "big stopper").
You can also use a remote cable, although it's not necessary for exposures up to 30 seconds on the Fuji. In fact, on the Fuji X-Pro1, there are 2 long exposure modes: B and T. In T mode, you can set the time from 2 seconds to 30 seconds (with the left arrow on pad).
In B ("Bulb") mode, you need a cable release, as the first shutter actuation will start the exposure, and a second actuation will stop it. So basically, you can make exposures as long as you want.

The other thing you need to know, is that the Fuji X-Pro1 has a Noise Reduction mode in the menus. I highly advise you to put this ON. This will take another black exposure for the same amount of time to measure the sensor noise and remove that noise from the original picture. The disadvantage is that it will take twice as long to take just 1 picture, because the camera will be blocked "processing".
Note that this Noise Reduction only comes in play after a certain amount of exposure time. For example with ISO 200, the minimum exposure time is 70 seconds for Noise Reduction to come into action. You can find a complete discussion of this in a Fuji-X Forum if you're interested to learn more.

Parc des Tuilleries

Here's my workflow:
  • find your vantage point and settle tripod
  • measure the exposure without the ND filter and find equivalent time for 10 stops longer. I usually set my f-stop to f/11 or f/16, which is the maximum on the Fuji XF 18mm lens.
To find the equivalent exposure time, I use a free iPhone app called "Long Time".

In my case (sunset time), I had a normal exposure of f/16 & 1/30th of a second. 10 stops longer is equivalent to 30 seconds exposure.
  • put ND filter on, set camera on tripod.
  • frame through LCD screen on the back. The great advantage of the Fuji X-Pro1 is that even with the ND1000 filter on, it can still see the scene, and even focus (I use manual focus because I don't want the camera to try to refocus when I take the picture afterwards).
  • Either put the camera on B or T mode, depending on your expsoure time (if it's max 30 seconds, use T).
  • Either put a 2 seconds timer (if you use T mode) or use the cable release and shoot.
The Fuji X-Pro1 is great for long exposures, as it will display the elapsed exposure time on the LCD screen (or in the digital viewfinder). No more need for a stopwatch! Release the cable after your desired exposure time, and let the camera do it's processing (if necessary).
Be sure to always use the lowest ISO setting (for the Fuji X-Pro1 it's ISO 200) as you want to take longer exposures, not shorter ones. Also, this will minimize noise in your picture.
My only issues were that each time you turn off the camera, the T setting resets to 2 seconds, so you need to push that left arrow several times in order to get back to 30 seconds. Also, the setting for the remote timer (2 seconds) is also lost when you turn off the camera. Maybe there is a way to keep this in between ON/OFF cycles, but I haven't found out how yet (leave a comment if you know).

Below you can find some examples of shots I took.

Place de la Concorde

This shot of the Place de la Concorde was taken early evening, with a ton of traffic... but thanks to the magic of long exposures, most cars disappeared!

We then moved into the Parc des Tuilleries.
Parc des Tuilleries

To arrive at what I find to be one of the most photogenic sites of Paris: the Louvre pyramids. I just love this place!
Louvre

Of course, we couldn't resist taking some long exposures of the Seine river. That's exactly what the ND1000 is made for: giving a sense of smooth flow to water. Here you have the beautiful addition of moving clouds.
Seine

You can see my complete set of Long Exposure Pictures of Paris with the Fuji X-Pro1 on Flickr.

Overall, the Fuji X-Pro1 is a really capable camera in the long exposure style. A real joy to use, as it is lightweight, prefect for travel, and so easy to move around with.

Sunday, April 14, 2013

Fuji XF 18-55mm f/2.8-4 OIS lens impressions

A work colleague was very kind to lend me his Fuji XF 18-55mm f/2.8-4.0 OIS zoom over the week-end (thanks again mate!).

First impressions: wow this lens is heavy! Compared to the 18 and 35 mm primes which I have, this zoom is considerably heavier. For such a lightweight camera as the X-Pro 1, the front heavy load is noticeable. I guess it's only worse on the even lighter XE-1.

The first time I used it I thought it was not working, so silent it was! When you focus, you can barely hear a sound; this is really great. And the focus... Wow, this is amazing! It's much faster than the primes and did I mention silent? ;-) I guess this has to do with an internal motor, while heavy, really works wonders. As always in photography (and life), it's all a question of compromises.

The zoom itself is very smooth. I really like how even in the optical viewfinder you see the frames moving when you zoom. I photograph my kids a lot and found it rather difficult to have focus confirmation with the optical viewfinder. That's especially difficult if they move around. My keeper rate was maybe 50% with the optical viewfinder. But when I switched to the electronic viewfinder, my keeper rate increased dramatically to 90%. Maybe I didn't have enough time with the lens to get a better feeling for it. I suppose the keeper rate would only increase with usage.

I'm not going to comment on sharpness, but for me the quality was more than enough. I shoot only JPG as they are just so good with the Fuji. I found the bokeh to be nice and creamy too. From a technical perspective, I found the lens excellent.

I didn't have much use for the optical image stabilizer. With such good performance at high ISO speeds, I don't really see the need for stabilization. On top of that, it's mostly my subjects that move, not my camera that shakes. I wonder if that stabilizer added a lot of weight to the lens? If so, I'd much prefer a lighter zoom without stabilization.

I also concur with some other reviews that were disappointed that aperture was not available directly on the lens. The aperture ring clicks but doesn't indicate any values. I understand that's due to the variable aperture of the lens (2.8 at 18mm vs 4.0 at 55mm). For that reason you always have to check the aperture in your viewfinder. But I really liked the fact that when you set it to 2.8 @18mm then zoomed to 55mm, the lens switched to 4.0, and when going back to 18mm, it switched back to 2.8 automatically. I didn't expect anything different in fact.

So is this a good lens? Absolutely! Apart from the slight overweight, I really liked it. If I didn't already own the 18 and 35 lenses, I'd definitively get this zoom. For now I guess I'll just keep zooming with my feet...

Here are the 18mm, 35mm and the 18-55mm zoom (zoomed out to 55mm) in size comparison:


A good example of the background blur you can achieve. This picture was taken at 55mm f/4.0 with a slight angle down the orange juice brick. Look how it slowly goes out of focus and the background bokeh. Very pleasing in my opinion!

Thursday, August 16, 2012

How to photograph fireworks

Fireworks

Taking nice pictures of fireworks is easier than you think. The only difficulty is that you need some equipment. Here's a list of what you'll need:

1) a sturdy tripod
2) a cable release (so you don't induce shake by touching the camera)
3) a DSLR capable of having mirror lockup function (not essential, see below)
4) a nice position overlooking the fireworks
5) patience for trial & error

Probably the most important point is getting to your location early, so that you can install yourself in a good spot. If it's already dark, it's a good idea to take a flashlight with you, as not all cameras have back-light LCDs (mine doesn't).
Ideally you want a high point, with not only sky included, as that quickly becomes boring. If you are able to find a spot with reflections on a lake and recognizable buildings, that's ideal. For the example pictures below, I was much too far to get any lake reflections, but you can clearly recognize Geneva's cathedral.

fireworks over Geneva

Set up your tripod, and frame the shot. Be sure to leave enough free space for the fireworks in your composition (and check this again when they have started).

Set the camera on manual focus, as it will not be able to auto-focus in the dark. In my case, I set focus on infinity, as I was very far away. I used a Canon 450D, with a 70-200 lens set at 200mm and a 1.4x multiplier. The final equivalent focal length in full frame format(adding the 1.5x crop factor of the 450D) is 420mm.

If your lens has image stabilization (IS in Canon speak, or VR in Nikon speak), turn it off. Since you're already on a tripod, there is no need for further stabilization.
If you have any filters on your lens, take them off. I have noticed that when I left my UV filter on, I got strange green ghosts in the image. Nothing irremovable in post, but a pain nevertheless.

fireworks over Geneva

For these pictures I used the following settings: ISO 100 (the minimum), f/8.0, and bulb mode. You want to control all three settings manually, so find out how to do that in your user manual.

Bulb mode means that your camera will stay open the time you depress the remote cable release.

Before shooting, you will also need to put your camera in mirror lockup mode. In the case of the Canon 450D, this is a custom function, so it's not easily accessible. If you don't find it, fear not. It's not totally essential, but it ensures less camera shake. Mirror lockup tells the camera to put up the mirror, before you open the shutter. This minimizes any vibrations inside the camera.

So once you've set manual focus, manual ISO, manual aperture (anything between f/5.6 - f/11 should do), and manual time (bulb mode), you're ready to shoot!

fireworks over Geneva

If you're using mirror lockup, remember that the first time you depress the shutter on the cable release, it will just instruct the camera to put the mirror up. You then need to depress the shutter again, and leave it down for the exposure time you want. I typically shot between 4 and 7 seconds. Here you need to experiment. You need to visualize where the fireworks are exploding. If they explode at multiple places, then the exposure should be shorter. You need to judge the amount of light that comes onto the sensor. If the fireworks pop slowly, you can leave the shutter open longer. If you're shooting the finale, then it must be shorter. Check your LCD after a couple of shots and you'll get the hang of it.

fireworks over Geneva

In the end, it's more luck than science. Sometimes you can shoot a nice sequence with difference types of fireworks at different heights. Other times, the picture will just be a huge mess, with too much clutter.

In any case, don't hesitate to shoot a lot of frames and shoot quickly (at the start of the show). You never know how much wind and smoke there will be after a couple of minutes of fireworks.

And lastly, when you pack up, be sure to check you haven't forgotten anything before you leave!

That's it for me. Let me know in the comments if you have any other tips & tricks.

fireworks over Geneva

Monday, July 30, 2012

Nendaz Alphorn Festival

Mountain Lake with cloud reflections

Every year in July, the best Alphorn players reunite in Haute-Nendaz (Valais, Switzerland) for the Festival international du cors des Alpes. This year I had the pleasure to be there and here are some pictures I took with mainly my Fuji X-Pro1 and the 35mm ƒ/1.4 lens.

Nendaz Alphorn Festival 2012

On Saturday, about 100 alphorn players compete in Haute-Nendaz. The jury is in a closed tent and cannot be influenced by seeing who is playing (as most alphorn players are well-known, it's a small family). They select 10 finalists to compete on Sunday, which takes place at the top of the mountain, in Tracouet. Again, the jury sits in a closed tent and select the 3 best players.

Nendaz Alphorn Festival

There are also other activities taking place, as a giant alphorn concert with 180 alphorns that day. I was mostly interested in this, as my father was amongst them. I must say, it sounded really great: on top of a quiet mountain, no other sounds than the alphorns.

Nendaz Alphorn Festival

Other typical Swiss folklore activities where presented. For example the cow bell swingers from the group "Les S'naillons de Torgon". Those cow bells must weight a ton, as they were really extremely loud!

Les S'naillons de Torgon

As for food, it was typical valaisan food too. I discovered a double raclette oven, and the server even told me there existed triple versions as well. Raclette is heated cheese, where they take half of a round cheese and grate off the top when it's hot. Highly recommended, it's delicious! And do not confuse this with a cheaper version where you buy little pre cut square cheese and heat it with an electric plate at home.

Traditional Swiss Raclette Cheese

The panorama was really beautiful, with the sun shining just what was needed. Here's a panoramic picture taken with my iPhone.

Nendaz Alphorn Festival

If you're in the Valais in July, I would highly recommend you go see this festival. This was the 11th edition. The 12th edition will take place from July 26-28, 2013.

You can see some more pictures on my Flickr photostream. Thanks for looking!

Friday, June 8, 2012

Fuji X-Pro1 review: slow down, take it easy!

I have used the Fuji X-Pro1 for about one month now, and shot about 1000 frames with it. This is not a technical review of the camera; you can find a lot of those already on the web. But I wanted to share my impressions of the shooting experience.

Targeted users

My impression is that Fuji brought out the X-Pro1 for high-end enthusiastic photographer (hence the "Pro" name and high price tag). If you know how aperture, speed, and ISO work together, and are willing to take time to compose a shot, then this camera will certainly suit you. If you are shooting fast moving objects (sports or even kids), then you are probably not going to like the X-Pro1 because of its slow autofocus and shutter lag (see AF discussion below). I've seen some reports from people who thought they were "ripped off" by Fuji after buying the X-Pro1. I can understand that, because this is not your typical point and shoot camera. Neither is it a DSLR replacement. It takes time to really understand the camera and get accommodated with this new style of shooting. It takes some effort to get the picture you want; it's not a point and click machine!

Physical impressions

Overall the camera is well built, although the bottom paint is a bit fragile in my opinion. The first time I saw it, I thought it would be much heavier in hand. That is really a great surprise, as both the body and Fuji lenses I have (18mm ƒ/2.0 and 35mm ƒ/1.4) are very lightweight. My intention was mainly to use the X-Pro1 for travel photography, as I was tired of lugging around my Canon 450D and the heavy lenses on family trips. The change was very welcome!

Shooting style

This is where I had to adapt myself most. Being used to optical viewfinders from DSLRs, I really wanted to get the same feeling in a smaller camera. There were numerous mirror less cameras, but most of them didn't have an optical viewfinder. I had long looked at the Fuji X100 and a friend let me try it. I really enjoyed it and almost ended up getting one. My major reluctance was that it had only one fixed focal length, and I didn't know if I could shoot like that. In the end, it was this friend who recommended I get the X-Pro1! The big innovation is the hybrid viewfinder: both optical and electronic. That means that you can either look through the optical viewfinder (OVF) like a DSLR, even though you don't actually look through the lens. You're just looking through a "hole" in the camera, with superimposed frame lines to show you the approximate frame the camera will shoot. These frame lines adapt when you change lenses; there is even a different magnifying glass that pops into the viewfinder when you switch between the 18mm and 35mm lenses. Very clever stuff, but I wonder how the thing will work when Fuji brings out zoom lenses. (Which are planned to come out later.)

A major drawback of the OVF is that you don't really see exactly what you will be shooting due to the slight difference of point of view between your eye and the camera's lens. This is called the parallax effect, and it's all the more pronounced the closer objects are to the camera. It's like putting one finger in front of your left eye: with both eyes you still see it, but if you close your left eye, it's gone. Focusing with the OVF is also quite "unconventional". By that, I mean that you will not be sure where the camera focused, as there are no focus point confirmations. Instead, you can see two rectangles in the center of the frame which will light up green when the focus is acquired. The rectangle in the center is for the far distance focus, and the dashed rectangle a bit more on the right and down, is for the closer focus. If the camera acquires focus close to the camera (say your subject is about 1m away), then the right rectangle will light up. If the focus is at infinity, the center rectangle will light up. And if the subject is in between, the green rectangle will be somewhere between the 2. It's more complicated to explain than seeing it! But in any case, it does take some time to get used to it and understanding intuitively where the camera focused. It’s a bit like learning to switch gears in a manual car when you’ve only driven automatics.

The other way to shoot is through the electronic viewfinder (EVF). This means that you get a real live view of what the sensor is seeing being projected into the viewfinder. This is the most accurate way of shooting, and the mandatory way in macro mode. I personally don't like it too much, maybe because I'm not used to it, but I find that it strains my eye quite a bit. The refresh rate is not quick enough for my liking. If I need to use the live view, I actually prefer to use the back LCD for that.

If you want a more detailed explanation, I'd suggest reading this good article.

AutoFocus (AF)

AF is probably the area where the photographer has to adapt the most, coming from a DSLR world. On my Canon DSLR I use the * button to acquire focus on the central focus point and then recompose. This works fairly well, except at really shallow depth of field (low F values). The only time I really care about recomposing is when I shoot with my very fast prime (the Canon EF 50mm ƒ/1.4 lens) full open at ƒ/1.4. DSLRs use phase detection AF while the Fuji X-Pro1 uses contrast detection. This means that on the X-Pro1, ideally, you should focus on a contrasted area, say something changing from black to white. This works great with shadows for example. You can also make the AF area smaller or larger, which I found really useful. I've set it to a smaller than default size and for me, focus seems to work better. You can also change the placement of the focus point to very far places like the corners of the frame; something that is totally impossible with a DSLR. Focus on the X-Pro1 is acquired when you half press the shutter button or use the dedicated AF button when using manual focus mode. One of the major flaws of the camera in my opinion is not so much the time it takes to get correct focus, but the shutter lag after that focus acquisition. Sometimes the camera can take a long time to shoot the frame; it's not always the case and I'm not sure why this happens. It doesn’t seem to have anything to do with the buffer writing (I use a fast Sandisk Extreme Pro 95MB/s card). It seems more like an electronic lag with the light measuring and aperture blades closing and re-opening. Hopefully this will be fixed soon by a firmware upgrade. To avoid this lag, some people have suggested pressing the shutter button down firmly, avoiding the half way AF acquisition altogether.

Image Quality (IQ)

This is where the Fuji X-Pro1 really shines! This is why I bought it in the first place. Even though the sensor is only an APS-C sized sensor, the picture quality can be compared to a full-frame sensor. Some people say it’s comparable to a Canon 5D Mk II. I don’t have a full frame camera so I can’t really compare, but it’s true the IQ is absolutely stunning. I am a big fan of shallow depth of field images, especially for portraits, with beautiful bokeh. This camera really convinced me on that point. You can see some examples of portraits shot wide open at the end (you can click on them to get bigger sizes). And I'm not even talking about high ISO pictures here, but they are absolutely amazing; ISO 3200 is perfectly useable.

Using the Fuji X-Pro1 with other lenses

Fuji X-Pro1 with Nikon Series E 50mm ƒ/1.8 lens

The beauty of this camera is that you can buy adapters for a lot of older legacy lenses. The purists will love the Leica M adapter, now officially available from Fuji. I bought a cheaper version on eBay (before Fuji’s came out) and got the chance to try some Leica lenses. I also bought the Canon EF mount adapter, but found it less desirable. Indeed, the EF (or EF-S) lenses don’t have an aperture ring adapter on them. This means that you will be shooting the lenses fully open (the lowest F number), which is not always good. Indeed, some lenses give poor image quality fully open. For example, my EF 50mm ƒ/1.4 lens is quite useless. It gives purple fringing and chromatic aberration to the image. For that reason I also purchased a Nikon F mount adapter as well as a cheap pancake lens (the Nikon Series E 50mm ƒ/1.8, see my other posts for more detail about that lens). This lens lets me adjust aperture directly on it, and it performs admirably well even fully open. It is totally incredible in fact; it must be one of the best quality/price ratio I’ve ever seen! One of the major negatives to using these legacy lenses is that you will lose AF. On the other hand, exposure metering still works flawlessly and the mysterious shutter lag is now gone. Adjusting focus manually is a bit difficult at first. Either you have excellent eyes and can do it fairly precisely with the back LCD, or you can see a 10x magnified image when you press the command dial. 10 x magnification is in fact huge for portraits. It works well with the 50mm lens, but with the 90mm I tried, you really need to have a steady hand, otherwise you’ll quickly feel sea sick! I wish Fuji would let us adjust the magnifying ratio by turning the command wheel while in magnification mode. Hopefully Fuji will also be adding focus peaking (check out this video to see focus peaking in action). Focus peaking would be really great, and make the manual focus process so much easier (even with Fuji’s own lenses).

Fuji X-Pro1 with Leica 90mm ƒ/2.0

Do I recommend this camera?

Some friends have asked me if I'd recommend them this camera. As lovely as the image quality is, I've yet to recommend this camera. The reason is that it's quite technical and none of my friends are as much into photography as I am. Of course, they could put the camera into Program mode (just use A on the aperture ring, and A on the speed dial), but that's not the way this camera is supposed to be used. And finally, if you take into consideration the high price, they are probably better off with a high end point and shoot, which is more state of the art than the Fuji.

Conclusion

I feel that the X-Pro1 has tremendous potential, but Fuji brought it to the market a bit in a hurry. When I see how they made the X100 so much better over time with firmware updates, I can only hope this will also be true for the X-Pro1. The main areas of concern for me are really the shutter lag and manual focusing. Overall this camera will make you slow down and think about the picture you want to take. This can be both a blessing and a curse. Not being an action shooter, this is fine for me. If you are more inclined to “make pictures” instead of “taking pictures”, then you’ll be fine too.

Fujifilm XF 35mm ƒ/1.4 @1.4 Me!

Nikon Series E 50mm ƒ/1.8 @1.8 K

Pipo
Nikon Series E 50mm ƒ/1.8 @1.8

Thursday, May 31, 2012

How to open the Nikon Series E 50mm 1.8 lens

After my last post describing how to open the Nikon lens from the back to clean the mechanical parts, I wanted to also clean the optics. There was some dust stuck inside the lens and my goal was to get it out.

The major problem I had was that I didn't have the proper tools to open the lens from the front. In particular, you need a friction disk to remove a ring in order to reach the front lens element. I had seen some people use double sided tape and use the back lens cover to unscrew the ring. But the most clever tip came from Michael Freeman, a canadian lens repairer who helped me out a lot (thanks Michael!). He suggested using a 1-3/4 inch (45mm) rubber sink stopper.

I went down to my local hardware hoping to find that. But they only had smaller diameters. I had to improvise another solution from what I could find there: using a big washer that I would cut to the right size. Then I needed to use a correctly sized glass that I could invert and apply pressure on the washer which in turn would make the ring turn (don‘t forget "Right You Tight it, Left You Loose it").

Here are my improvised tools (click on images for bigger versions):

Once I got that front ring off (which is threaded), it was just a matter of getting the 6 screws off and pulling the front elements out of the lens. You can then see the aperture blades underneath. I didn't go further; only blew some air in there to get the dust off. The front 2 elements also had dust stuck in between them, so I had to get them separated. There was a slight point of glue on the second element which I removed with some acetone (nail polish). Then you can unscrew the 2 elements and clean them. Reassemble exactly the same way backwards.

A schematic of the optics:

Cleaning the optical elements is easy once you have the right tool to open that ring! I hope these instructions can be helpful to somebody.

And just to show how great this little pancake lens is, check out a some pictures. When you nail the focus, sharpness is excellent for portraiture, as you don't need to have a needle sharp lens for portraits. These shots were taken at f/1.8. If you don't mind manual focus, then this lens is really worth it!

Pictures straight out of the Fuji X-Pro1 camera, shot in JPG. Look at that bokeh!